Creation/Dev/Gani Movie
Gani Movies FAQ
A gani movie is a gani file, which may or may not combine several ganis, text and sounds to form an animation. Here Kiirar is to give you a guide to making a gani movie. Now, open up Graal Shop and in the top right corner, you should see a button called "Movie Mode". Click it.
Let's get started.
The Basics
This little device will be quite cruicial in making movies. It decides on the length of your movie.
![]() This is what it should look like.
This is what it should look like.
The numbers along the bottom are the numbers of seconds in the animation. You can extend or retract this by grabbing the red square with your cursor and dragging it right (to extend it), or left (to retract it). The triangular shape denotes at what time frame you are in at this moment. It is currently at 0. Drag it along to number one.
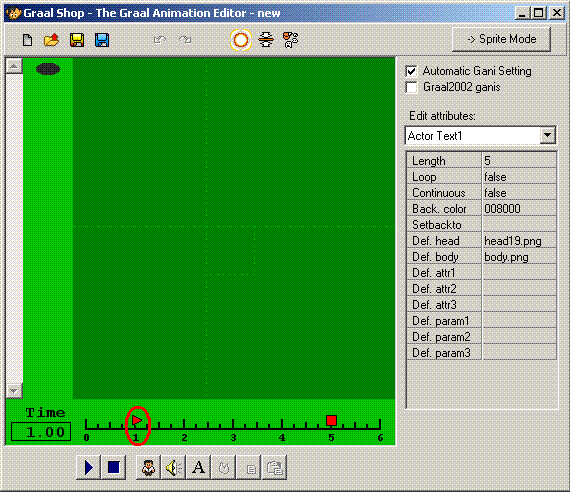
This is the result
The time box now reads '1.00'. You are now in the time frame of 1.00. It will look no different, until you add things. Now, grab the square button. And drag it left to four, it will decrease the total time the gani will take to play. It should look now like this.
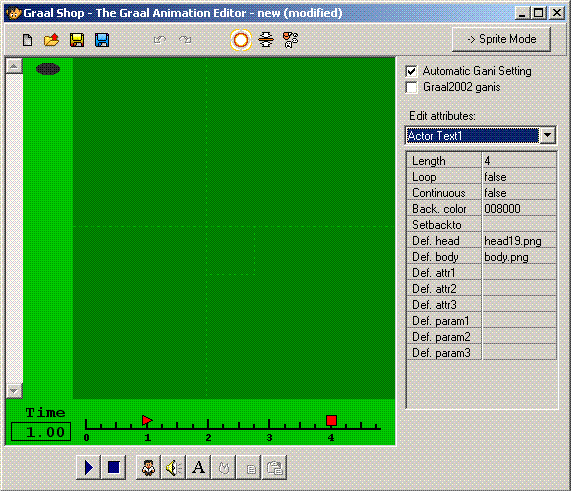
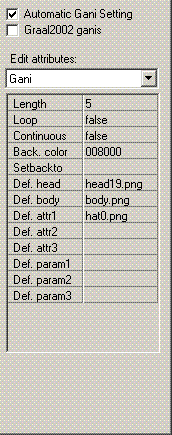
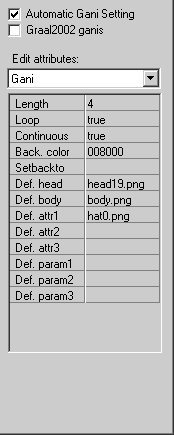
But I digress. Now, the bar on the right. It should look like this.
This is what it should look like.
If you clicked the Graal2002 ganis button, Graal 2002 player ganis will be used. We'll leave it unclicked for now. The length button, here you can change the length of the gani, similar to using the square to drag out the time. The next two buttons are to tell if the gani is looped or continuous. Self-explanatory. Back. color is the background colour of the Graalshop background, I prefer default. The next few I believe you will not need. Or I haven't found a use. Also, you can add sprites in as you would in regular ganis also.
Objects
Okay, set all your time frames to default. (Triangle = 0, Square = 5)
Now. Let's add an actor.
Click on this button if you can find it.

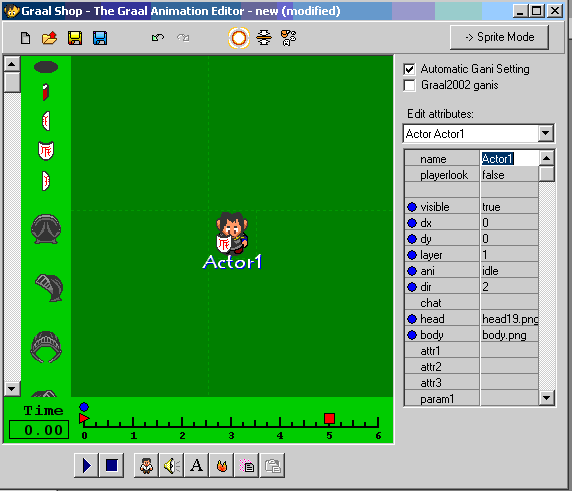
This should be the result of your click
This is Actor1. The number will change depending on the amount of actors.
Now you have an actor which resembles Stefan, let's change that ugly look, ne? But first, take a look at the time bar.
See that blue circle? Funny the things you learn in geometry nowadays.
That blue circle is the keyframe. It is that actor's keyframe, it will only matter to him. A keyframe is a frame that you give the actor/text/sound instructions, and those instructions will be carried out until the next keyframe is reached, then a new set of instructions will be given. You can delete keyframes apart from the first keyframe. Now, changing the actor's attributes.
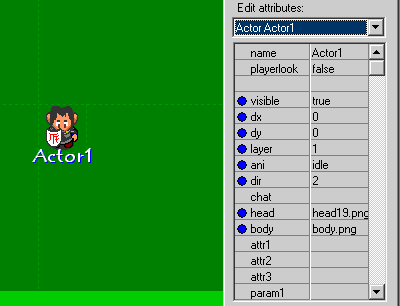
Here is the first set of Gani attributes.
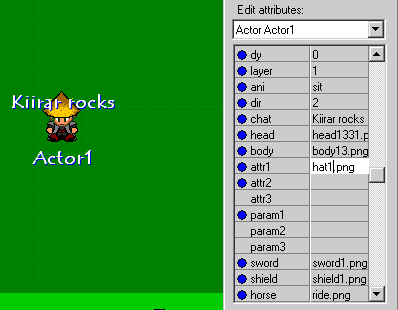
Now, Actor1, even though it wont show up on the client. Is still bad. Let's change it to something nice. Like Kiirar. Playerlook will make the character return to the default look. Leave this set to false. Now, the blue circle next to visible means that the instructions for that particular attribute are being altered in this keyframe. Visible set to false means the actor will disappear. Keep it set to true for now. DX and DY are the x and y of the actor in the gani. The layer is the layer the actor is in, it's unlikely you'll need to alter it. But mlah, if you increase it, he will be be placed above anything on layer 1, and vice versa. The ani in this keyframe is set to the most famed gani, idle. You can set this to any ani you have in your graal folder, and the actor will play it out. Set it to sit for now. Dir is the direction the character is facing. 0-Up 1- Left 2- Down 3- Right. Keep that at two. Now, enter in the box 'chat', 'Kiirar rocks'.
A blue circle will appear next to it, signalling that the chat attribute has been altered in this keyframe. You can create new keyframes by moving the triangular play button to a different time frame, and altering an attribute in that frame. Now, to get rid of the first Stefan look. Change the head from head19.gif, to head1331.png. And huzzah, in the keyframe, the head changes. If it is set in a keyframe after the first, it will use the default head until the keyframe in which it is set to head1331.png. Same with body. Set it to body13.png
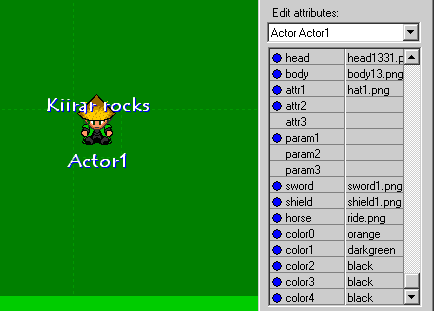
Things are starting to look good. Now. The next boxes are the attributes. You will have learned about these in Karsh's FAQ. Attr1 is the hat of the actor. For fun, set it to hat68.png. Not my usual luck, but mlah. The next three boxes will be the params, also learned in the regular gani FAQ.
After the parameters, is the sword, shield and colours section. Change the sword and shield how you wish. Color 0 is the skin, color 1 is coat, color 2 is the sleeve, color 3 is the shoe, and color 4 is the belt. Set them to this 0 - orange 1 - darkgreen 2 - black 3 - black 4 - black Thus ends the actor attributes. You should have your character appear like this.
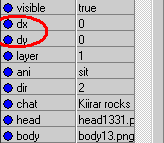
Now, we'll make him move. Click on the dx, and dy of the current keyframe, and press enter. This just makes sure that the instructions were set this turn.
Now, move the time bar triangle to two. Your actor should stay in the same place, doing the same thing, this is because it hasn't been told to do otherwise. Now that you are in time frame 2, grab your character and drag him right. A new keyframe has been created. You can alter attributes, and once the time reaches that keyframe, any attributes altered will take effect. Remove Kiirar Rocks from the chat attribute. Now, press play. The character should automatically walk over to the spot designated in the keyframe, and once he reaches it, Kiirar rocks will be deleted. Try experimenting a bit with different ganis and keyframes, now we move onto text.
Return to timeframe 0.00 and click on this button.
Right. It should appear where your kiirar actor is. You can drag it around in this time frame, drag it above Kiirar. You are familiar with attributes by now, and can guess what they do, so I'll dispense with the screenshot. But, when you reach an attribute called Zoom. Set it to 0.2. Now move to timeframe 2.00. The text will be there, minutely. In this frame, set the zoom to five. Press play, and watch the text arise.
There are many other effects you can use, so I'll leave you to experiment.
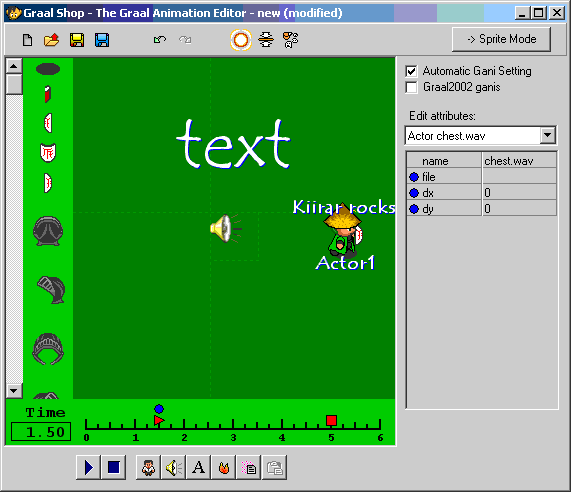
Now, see the loudspeaker button next to the text button, click it and a sound will appear. A sound can only appear in one time frame. So, set the time frame to 1.50. Click the sound button in this frame. The only attribute that may be of concern is filename. Set it to chest.wav. It will then play chest.wav in this frame. Now you've grapsed the basics of things, I'll leave you to it.
Oh, here is the gani I helped me make :D
