Driving MiniGame
Welcome to the Driving MiniGame tutorial.
This is a simple and easy car driving example. It is not focused on the actual driving experience itself, but more on introducing new Unity functionalities.
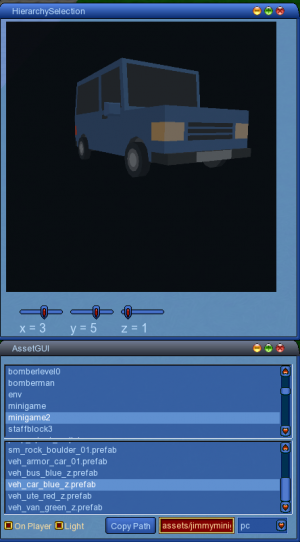
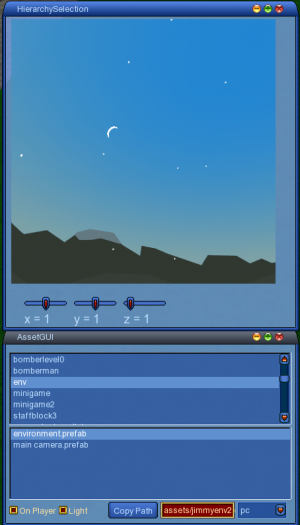
Asset Bundles: minigame2, env
using the bundle explorer (F10) :
minigame2:
env:
The script is found in the weapon: 3D/Jimmy/Minigame2
findplayer("GraalID").addweapon(this.name);
this.join("3d_merlin_camera");

//#CLIENTSIDE
function onPlayerChats() {
  if (player.chat == "dest") dest();
  if (player.chat == "drive") drive();
}

function drive() {
  destLevelName = "only_ground.nw";
  x = 19;
  y = 10;
  z = 0.7;//0.7;
  WARPMANAGER.Warp(x, y ,z ,destLevelName);

  sleep(1);

  new GuiWindowCtrl("MyGUI_Minigame_Window1") {
    profile = GuiBlueWindowProfile;
    style = $pref::Video::defaultguistyle;
    clientrelative = true;
    clientextent = "320,240";

    canmove = true;
    canresize = true;
    closequery = false;
    destroyonhide = false;
    text = "Window 1";
    x = 490;
    y = 242;

    new GuiButtonCtrl("MyGUI_Minigame_Button1") {
      profile = GuiBlueButtonProfile;
      text = "Car";
      width = 80;
      x = 77;
      y = 31;
    }
    new GuiButtonCtrl("MyGUI_Minigame_Button2") {
      profile = GuiBlueButtonProfile;
      height = 31;
      text = "Bus";
      width = 80;
      x = 77;
      y = 69;
    }
    new GuiButtonCtrl("MyGUI_Minigame_Button3") {
      profile = GuiBlueButtonProfile;
      height = 31;
      text = "Quit";
      width = 80;
      x = 78;
      y = 109;
    }
    new GuiTextCtrl("MyGUI_Minigame_Text1") {
      profile = GuiBlueTextProfile;
      height = 20;
      text = "Select Type:";
      width = 71;
      x = 11;
      y = 5;
    }
  }
}

function MyGUI_Minigame_Button1.onAction() {
  // Button "Car" has been pressed
  Quattro::AssetManagement::LoadAssetBundle("minigame2");
  Quattro::AssetManagement::LoadAssetBundle("env");
  this.vehicle = "car";
}

function MyGUI_Minigame_Button2.onAction() {
  // Button "Bus" has been pressed
  Quattro::AssetManagement::LoadAssetBundle("minigame2");
  Quattro::AssetManagement::LoadAssetBundle("env");
  this.vehicle = "bus";
}

function MyGUI_Minigame_Button3.onAction() {
  dest();
}

function onAssetBundleDownloaded(bundlename) {
  if (bundlename == "env") {
    this.env = GameObject::createfromassetbundle("env", "assets/jimmyenv2/Environment.prefab");
    this.env = Object::Instantiate(Type::GameObject, this.env);
    this.env.transform.position = Vector3::Create(player.x, player.z, player.y);
  }
  if (bundlename == "minigame2") {
    if (this.vehicle == "bus") {
      dest();
      this.vh = GameObject::createfromassetbundle("minigame2", "assets/jimmyminigame2/Veh_Bus_Blue_Z.prefab");
    }

    if (this.vehicle == "car") {
      dest();
      this.vh = GameObject::createfromassetbundle("minigame2", "assets/jimmyminigame2/Veh_Car_Blue_Z.prefab");
    }

    this.vh = Object::Instantiate(Type::GameObject, this.vh);
    this.vh.transform.position = Vector3::Create(player.x - 2, player.z, player.y - 5);
    this.vh.AddComponent(Type::RigidBody);

    PLAYERMOVEMENT.Freeze();
    Quattro3D::PlayerCamera::Instance.FreeCam = true;

    handleMovement();
  }
}

function handleMovement() {
  this.on = true;
  SetTimer(0.05);
  this.speed = 40;
  this.rotation = 400;
}

function onTimeOut() {
  if(this.on) {
    temp.campos = this.vh.transform.position.Add(Vector3::create(0,10,-7));
    Quattro3D::PlayerCamera::Instance.transform.position = temp.campos;

    this.vInput = Input::GetAxis("Vertical");

    this.hInput = Input::GetAxis("Horizontal");
    if (this.vInput < 0) this.hInput = - Input::GetAxis("Horizontal");

    this.vh.transform.Translate(Vector3::forward.Mult(Time::deltaTime * this.speed * this.vInput));
    this.vh.transform.Rotate(Vector3::up.Mult(Time::deltaTime * this.rotation * this.hInput));
    SetTimer(0.05);
  }
}

function dest() {
  this.on = false;
  cam1();
  PLAYERMOVEMENT.unfreeze();
  Object::Destroy(this.vh);
  Object::Destroy(this.env);
}
Here we create a UI for the player to choose what vehicle to choose, and we load and instantiate the prefab based on the choice.
New: Camera
The Camera is the point of view. Here we want the Camera to follow the car while driving and not the player.
In function onAssetBundleDownloaded(bundlename). We use:
| Quattro3D::PlayerCamera::Instance.FreeCam = true; |
|---|
To free the camera, it won't follow any GameObject.
Then in function onTimeOut() we want the camera position to be updated with the vehicle's position.
temp.campos is the variable we store the camera position in. We want it to be behind and above the vehicle for a good view. This is why we get the vehicle's position and add a Vector3 to it:
| temp.campos = this.vh.transform.position.Add(Vector3::create(0,10,-7)); |
|---|
now:
| Quattro3D::PlayerCamera::Instance.transform.position |
|---|
allows us to the get the Camera GameObject and to access its transform component and change its position.
We have implemented default cameras found in class : 3d_merlin_camera
In order to access them, we join the weapon with that class: this.join("3d_merlin_camera");
and we call the function cam1(); in function dest() to go back to the default cam.
New: Unity Input
| Input::GetAxis("Vertical"); |
|---|
"Vertical" / "Horizontal"
It checks the arrows pressed and gives a value in the range of (-1 to 1) -1 indicating "down", 1 "up" and 0 "neutral".
We use it here to translate and rotate the vehicle.

